Online Auction Type simulates the auctioneer and bidders carrying on a real live auction. This is a true LIVE ONLINE AUCTION!

How to Use Google Search Console for my Auctions
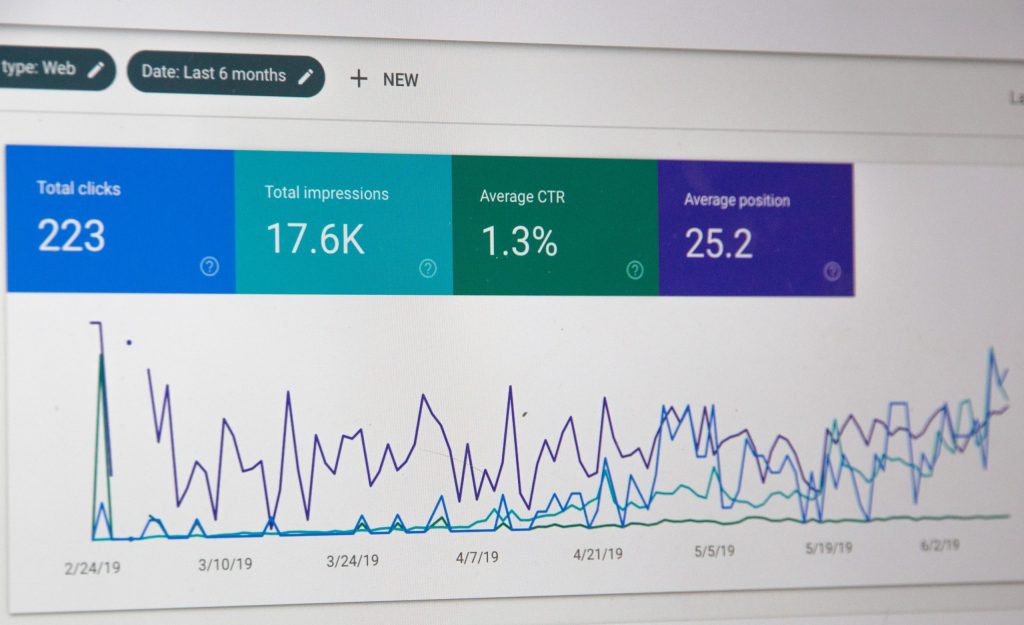
Google Search Console (GSC) is at the frontline of the battlefield when it comes to the search engine results page (SERPs). If you have a website presence, Google Search Console will be an amazing tool for you to utilize. GSC not only tells you everything you want to know about your website but also everything about the people who visit it daily. Below are useful insights that comes with the Google Search Console dashboard:
How much web traffic you are attracting
What are people searching for on your site
The platform people are using when visiting
What makes your site popular to the users
With that being said, you can see the importance of using Google Search Console for your auctions and the benefits that would come from it. Below we will go through a step by step process of setting up your account and benefits that come along with implementing Google Search Console for your auction website.
Setting Up Google Search Console
Setting up your Google Search Console account for your auction website does not have to be difficult. You will need to first set up your account then verify your website and you are on your way to understanding more about traffic to your site, performance measures and potential threats. Below we go into more detail.
Setting up Google Search Console Account
The first step that needs to be done is to get verified by Google. By doing this, you will be ensuring that Google classifies you specifically as the owner of the site. This simple step is necessary because once you are verified, you will be able to access an incredible amount of rich source of information that should not be accessed by unauthorized users.
Once you set up your account you will then want to Add a property, choose website from the drop-down menu and type in your auction’s website URL.
*Important: make sure to use the exact URL that appears in your browser bar.
Verify your website
You will be presented with four verification methods and it is up to you to choose which you prefer to help Google verify your site ownership.
Method 1: Add HTML tag
It helps here to have experience working in HTML for this option. It will be easier to handle the files; you will have a better appreciation of how the size of the website influences the Google crawl rate and learn more regarding the Google programs that are already running on your website.
*Important: make sure you past the search console provide HTML tag within thesection of your site’s HTML code.
Method 2: Upload HTML file
Once you are in Google Search Console, go to “Manage Site” then “Verify this Site” to locate the “HTML File Upload” option. Here, you will be prompted to download an HTML file that should be uploaded in its specific location. Once the file is loaded, go back to the console panel to verify, and once that is done you will receive a message confirming the site is verified.
If everything is done correctly, you will see a page informing you that your site is verified
*Important: Do not change, modify, or delete the HTML file as that will bring the site back to the unverified status.
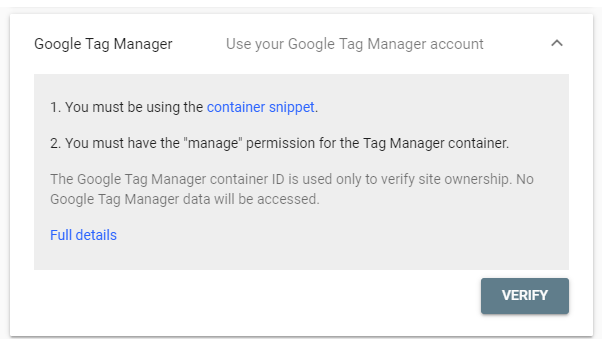
Method 3: Google Tag Manager
For this option you will need to be familiar with Google Tag Manager (GTM) and have an account set up already. Google Tag Manager is a free tool that helps manage your marketing analytics on your website or app. It also doubles up as the third method to verifying your website.
If you intend to use this option there are two precautions you will need to take; open your Google Tag Manager account and enable the “View, Edit, and Manage” mode and also ensure that the GTM code figures adjacent to the tag in your HTML code. Once these are complete go back to your Google Search Console and follow this route –>
Manage Site> Verify this Site> Google Tag Manager. By clicking the “verify” option in Google Tag Manager, a message will pop up indicating that the site has been verified.
*Important: Never attempt to change the Google Tag Manager code on your site as this may bring it back its unverified position.
Method Four: Securing Status as the Domain Name Provider
Once you are done with the HTML file tagging or uploading, you will need to verify the domain that you have purchased or the server where your domain is housed to prove that you have absolute power of the domain.
You will need to open the Search Console dashboard and navigate to “Verify this Site”. Then Click “Domain Name Provider”. When you are positioned in the “Domain name provider” you will be shown a listing of domain hosting sites. You have two options from here:
1. If your host name does not show up, then click “other” tab you will need to create a DNS txt code.
2. If the DNS txt does not match your provider, you will need to create a DNS txt record or CNAME code that will be customized for your provider.
From here you will be able to see a dashboard that shows you all types of important data regarding your website. This data helps you measure your site’s search traffic, performance, fix issues, and make your site shine in Google Search Results.
Benefits of Using Google Search Console for your Auctions
- Improves your search engine visibility
- A Constant updated and Optimized Site
- Safe from Cyber Threats
- Access to status report to help you obtain rich results
- Opportunity to address mobile user experience- faster and more responsive to mobile users
- Backlink Analysis
Here at Auctioneer Software, we understand that all of this information might be a bit overwhelming and you don’t know where to start. Don’t freak out, we are experts with this! We specialize in setting this up for our clients and we also maintain and optimize their site to be healthy and ultimately bring you more traffic and increased bidders.
Contact us today to see if we can help you out!